How to Migrate from WordPress.com to WordPress.org
Are you considering moving from WordPress.com to WordPress.org? Many beginners start their blogging journey with WordPress.com, recognizing its limitations and yearning to expand the possibilities offered by the self-hosted WordPress.org platform.
In this carefully crafted, step-by-step guide, we will expertly guide you through the process of successfully migrating your blog from WordPress.com to WordPress.org. Give your blog the freedom and flexibility it deserves with our comprehensive guide and make your edit a resounding success. Welcome to another season of intense blogging
Content
What is wordpress.com
WordPress.com, provided by Automattic, is an easy-to-use hosting platform that allows users to start creating websites and blogs.
It eliminates the need for users to maintain server configuration and installations, and offers both free and paid plans.
Customization is available through pre-built themes, including specialized SEO and social sharing features. However, compared to self-hosted WordPress.org sites, WordPress.com has limitations in flexibility and customization. Even so, it’s a convenient option for those looking for a simple web design.
We recommend WordPress.org because it gives you complete ownership of your site, giving you the freedom to manage and control all of its features. To explore these features in more detail, please check out our comprehensive WordPress review, including its pros and cons
Things You Need Before You Start
To get started with self-hosted WordPress.org, you can secure a WordPress hosting account and get a domain name. For this, we recommend bluehost, as they stand out as one of the biggest hosting companies in the world and hold the official recommendation for WordPress hosting.
If your WordPress site already has a custom domain name, you’ll still need web hosting. Just register with Bluehost and, in the domain section, add your blog domain.
The next steps will guide you through maintaining the same domain during the migration from WordPress.com to WordPress.org, ensuring no negative impact on search rankings.
In addition to your new hosting account, You will also need access to your WordPress.com account for easy migration of posts, pages, images, articles, comments and other data to your self-hosted WordPress site.
Exporting Data From WordPress.com
First, you need to sign in to your WordPress.com site and go to your account dashboard.
From the left column, you need to click on the Tools » Export menu and then click on the ‘Export All’ button.
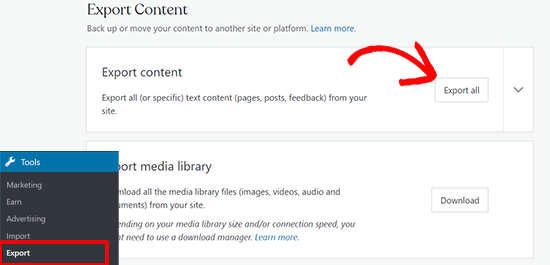
This allows you to export your WordPress site. Once the export file is ready, a download link will be visible. You can click to download the file on your computer.
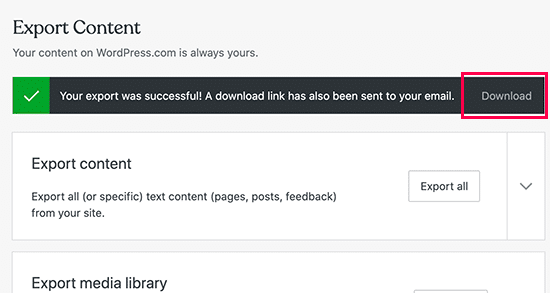
Once you have downloaded the file to your computer, you need to unzip it if it was downloaded as a zip file.
Inside it, you’ll find an XML file with all your posts, pages, images, comments, custom fields, categories, tags, navigation menus, and other data.
Setting Up WordPress
Now that you have exported your WordPress.com data, the next step is to set up a new WordPress on your web hosting.
Installing WordPress is very simple and takes just a few clicks. If you signed with Bluehost, WordPress will automatically install for you.
Alternatively, if you choose another hosting service, you can follow our step-by-step tutorial on how to install WordPress in 5 minutes.
Once you’ve installed WordPress, it’s time to upload your content to your new WordPress website.
Importing Content into a Self-Hosted WordPress Site
To import your old WordPress.com site content to your new WordPress.org site, you will need to log in to your freshly installed WordPress website’s admin area.
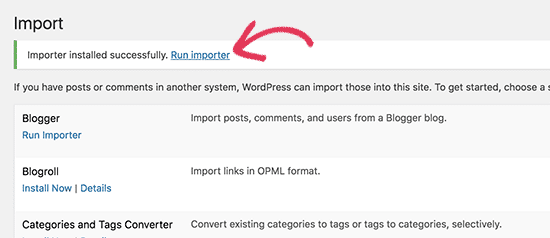
From here, you need to visit the Tools » Import page and click on the ‘Install Now’ button below WordPress.
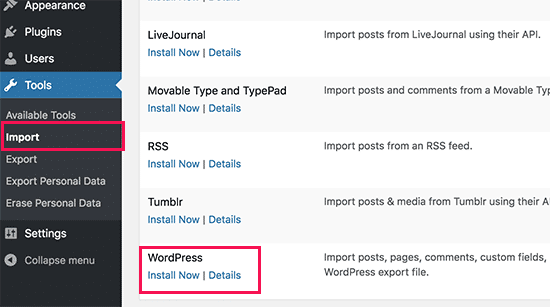
WordPress will now install the WordPress importer for you.
Once it’s done, click on the ‘Run importer’ link to continue.
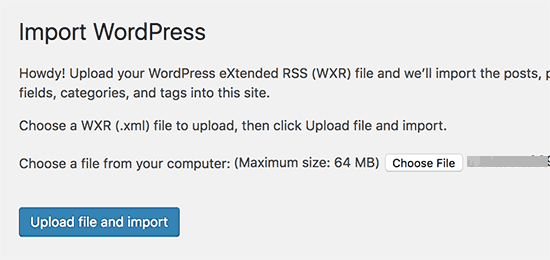
It will take you to a screen where you will be asked to upload the WordPress.com XML file that you downloaded in the previous step of this tutorial.
Click on the ‘Choose File’ button to select the file, and then click on the ‘Upload file and import’ button.
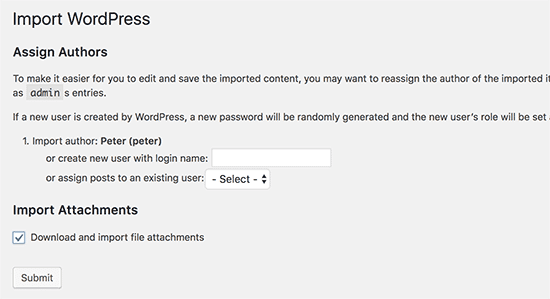
When you start importing, you can assign imported content to an existing user or create a new user.
You’ll also have the option to import file attachments. You must check this box so your image files are correctly imported.
Now, if you don’t want to redirect your old users to your new site, this will be your final step.
First, visit your old blog’s WordPress.com dashboard. From the left menu, you need to click Settings » General menu and scroll down to the ‘Privacy’ section.
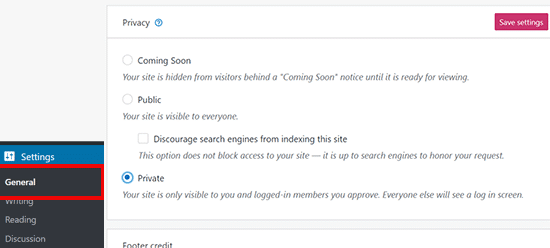
From here, you need to select the ‘Private’ option and then click on the ‘Save settings’ button.
This will make your old WordPress.com blog private, and it will only be visible to you or other logged-in users that you approve.
Furthermore, if your blog has been out there for a while, then chances are that it is indexed by Google and other search engines.
You can keep all the search engine rankings and easily redirect your old users to your new blog by following the next step
Redirecting Visitors and Preserving SEO
Redirecting users to the new location with the 301 header is a standard solution to keep search rankings while moving a site from one place to another.
Since you don’t have access to the .htaccess file on WordPress.com, you cannot make any changes to retain search engine rankings.
However, WordPress.com offers a paid upgrade feature called ‘Site Redirect’, which provides this functionality.
Simply go to the Site Redirect page. If you have multiple sites on WordPress.com, you will be asked which one you would like to redirect.
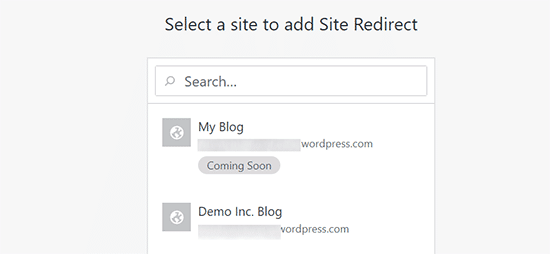
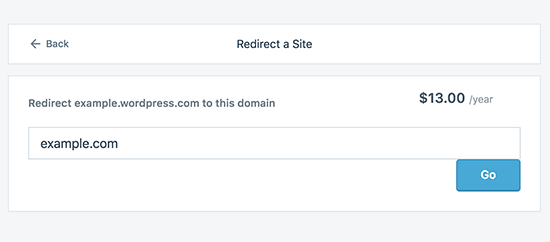
On the next screen, you will be asked to provide the domain name where you want visitors to be redirected. Enter your new WordPress.org site’s domain name and click on the go button.
Note: Site redirect is a paid upgrade and costs $13 per year. It will add a 301 redirect, which redirects your WordPress.com blog’s visitors and search engines to your new site.
For those asking how long to keep paying for the Offsite Redirect feature.
The choice is entirely yours. You can keep using it as long as you feel it is necessary. However, we recommend considering a period of at least 2 years, which gives former users enough time to get to know and remember your new domain name.
Conclusion
We hope this article helped you properly move your blog from WordPress.com to WordPress.org. You may also want to see our checklist of the most important things you need to do after installing WordPress and our ultimate guide on increasing your blog traffic.
